Let’s see how our first trial growing microgreens turned out. There are so many ways to record the progress of your sprouts but the key to growing microgreens is daily observation and learning to look closely. How damp (or dry) is your soil? Is this the right location? Is there enough light & warmth? Are all the seeds germinating and growing at the same rate or are some slower? Below are some progress pictures to help you know what to expect. We will also show you when and how to harvest. For those of you who had some trouble, we have also included some troubleshooting tips.
Sprout Progress

Day 2
These radish sprouts were a surprise that made me smile. We put some seeds in and then decided we needed a deeper layer of soil, so I just dumped soil on top and then put more seeds on the surface. Those covered seeds got going quicker and pushed the soil with barely-sprouting seeds out of their way. Look through the plastic to see them. Do you know what sprouts out of the seeds first, a root or a shoot? The seeds on the top layer of soil might give you a hint.

Day 4
Arugula was in the sunniest warmest spot, on the sill just above the radiator. It grew in record time. The brown crumble is coconut coir that was pushed up with the little seed leaves. There was no wind inside to blow it away.

Day 5
Oops, we forgot about these corn sprouts in the dark and let the soil completely dry out. They are just getting started so they might be slower but I think we still have hope. The roots are still white and not dried out or brown.

Day 6
The pea sprouts which are usually most forgiving, seem so slow. I harvested arugula today but these little ones are barely showing their first leaves. Look closely, there is a rectangular section where not much is happening at all. See the patch of seeds without leaves and only a couple white roots reaching down? What do you think might be the problem?

Day 10
These radish sprouts are ready to harvest!
Are They Ready Yet? When Can We Harvest?
The best answer we can give is…it depends. Sometimes it takes 3 weeks and sometimes 7 days, depending on how carefully and consistently you water, how strong the light is, how old the seeds are, or even the quality of the soil. But there are things to look for. It varies with different types of sprouts.

Radish or Sunflower
Harvest when the seed leaves (the first 2 leaves to sprout) are fully developed but ideally before the true leaves sprout. If you look at the elbow area between the leaves of the 2 sprouts above, you can just see the beginnings of true leaves. These were the biggest leaves I cut.

Pea sprouts
Harvest when the shoots are about 4-6 inches. I could have let these get a bit bigger and they would have tasted just as delicious but I really couldn’t wait. I wanted to eat them with my Vietnamese Spring Rolls.

Corn sprouts
Harvest when the yellow leaf uncurls to show its full glory. The 3rd leaf on the right is still young, delicious and sweet, but small. You want the majority of your batch to look like the one on the left.
If your sprouts get their true leaves before you harvested, and it can happen suddenly, harvest anyway and make your dressing a bit sweeter. Experiment: do a taste test comparison with one that has only the first 2 leaves, which is sweeter? Is one a bit more bitter?

HARVESTING SPROUTS

METHOD
- Pick & Choose
- Clear Cut
EQUIPMENT LIST
- Kitchen shears or small clean scissors
- Clean container from the kitchen (tupperware or container with a lid is great)
Cutting Sprouts
Take your clean scissors. I like to use small ones only used for sprouts. Cut above the soil level, below the leaves. Try to avoid cutting through the middle of a leaf for longer shelf life.

Method 1: Pick and choose
Cut individual leaves or small clumps. Use this method when you can’t wait any longer but the bulk of your sprouts could grow a bit more, to thin a batch, or to harvest a small amount for your sandwich. I often harvest just what I am eating in sections, and leave them growing as long as possible for optimal freshness.

Method 2: The Clear Cut
When everything is fully grown and ready and you want to harvest the whole batch for a meal or to put in the fridge for the week. At a certain point, sprouts will start to yellow and lose their sweetness if you let them keep growing. This sad little forest of sticks is all that will be left. But most sprouts will come back a second time, though they will look a bit less robust.
Look at the Bounty!
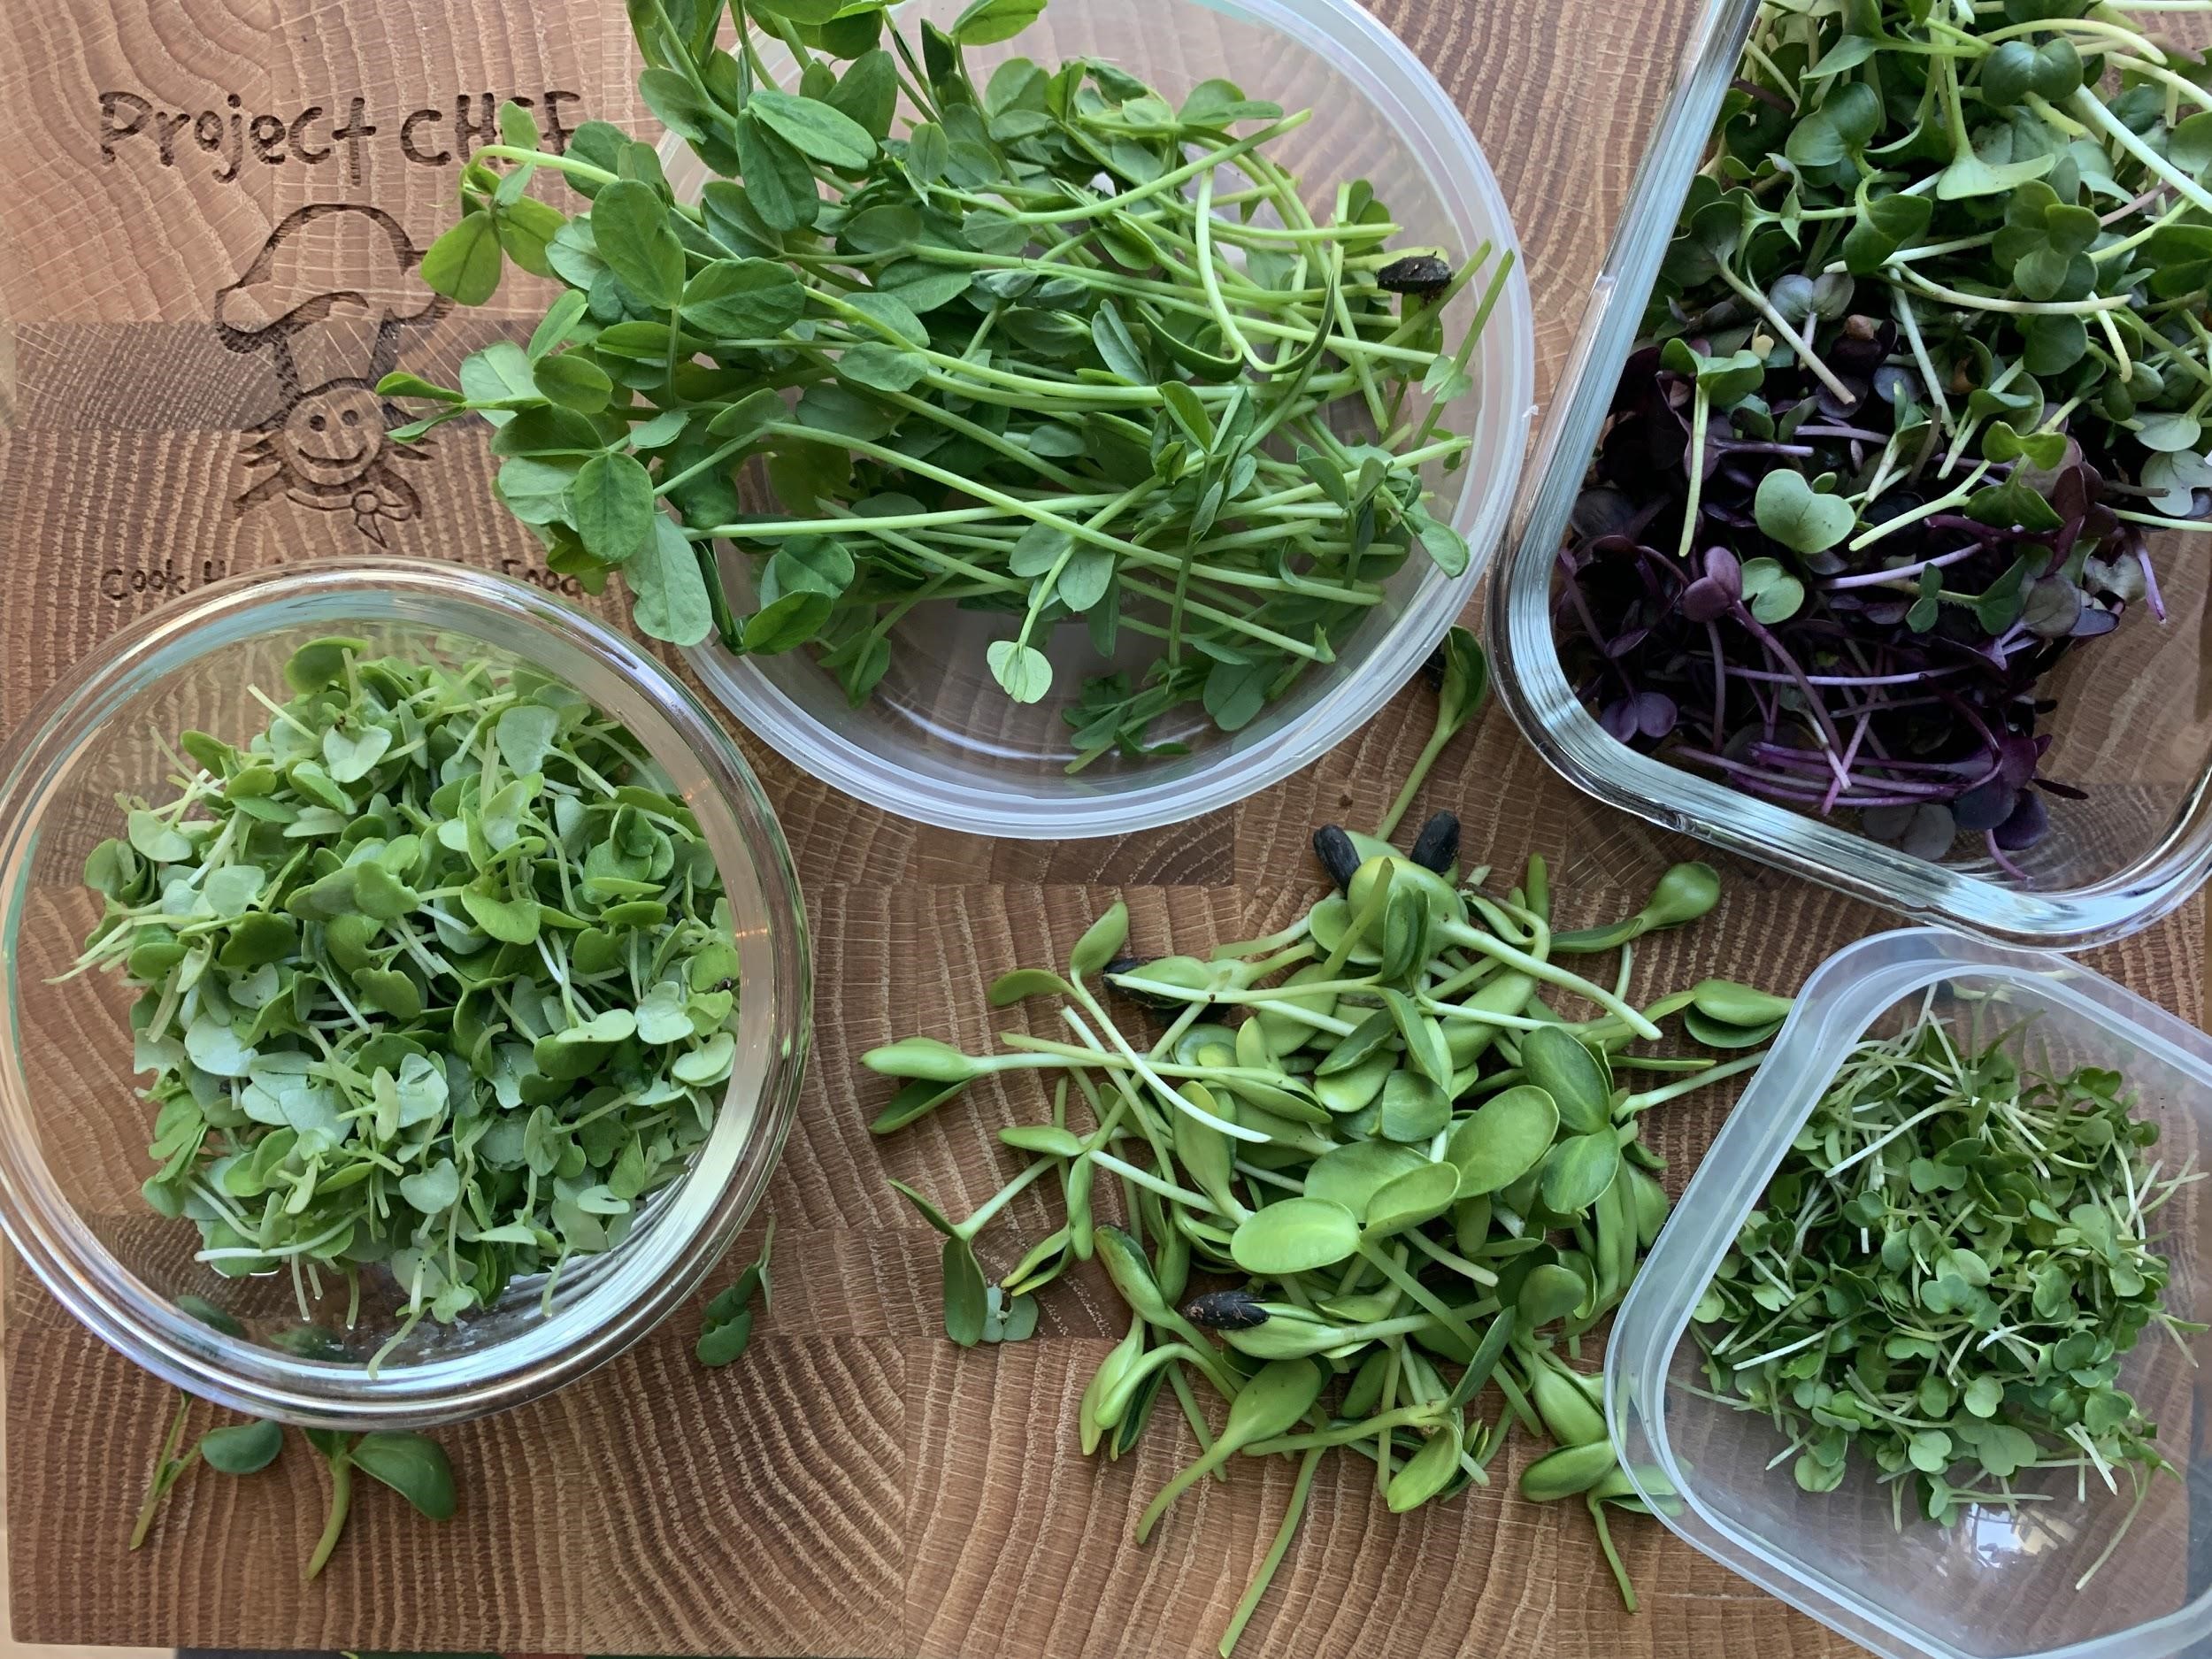
Use sprouts to add to a salad, a sandwich, some tacos, spring rolls or any other recipes you can think of.

If your sprouts didn’t really thrive, and there isn’t much to harvest yet… well, the important word is yet. Try again. See below for some clues to troubleshooting.
Troubleshooting

Seeding too densely
Wondering about those pea sprouts that never really shot up? If you look near the center of this picture, there is a brownish looking shoot. It’s actually the root. The roots are super long, twisting over the top of other seeds in search of soil access. Roots are growing over the leaf shoots in places. There are seeds on top of other seeds. There is no space between the seeds for the roots.

Troubles rarely come calling alone!
We suspected light was an issue too. After the first little harvest, these were moved to the windowsill for full light. Look closely, the dead zone has started to sprout and the harvested sprouts are coming again.

Overwatering
Look for mold or green algae on the soil surface, a sure sign of overwatering. It happened to my quinoa. Browning or wilting shoots? Probably also over-watering. Baby seedlings are vulnerable to damping off when overwatered. If the stem is looking brown and weak near the soil surface, or the seedling is wilting, sanitize and replant with new soil, new seeds.

Seed viability
These lentils didn’t do much for many days. Did you use old seeds or something from the pantry? Try a germination test by putting 10 seeds in a wet paper towel and putting that in a baggy, in a warm spot. In 5-8 days open the paper towel to see if the seeds are sprouting. If 6 or fewer sprouted, you might need different seeds.

FYI
Roots also have little white hairs, so if the sprouts are looking healthy but you see white fuzz, it could be root hairs. See upper left corner of corns sprouts.
Curriculum Connections

Science

Language Arts
© Project CHEF
Not to be copied or reproduced without express permission from the author

