With signs of Spring popping out around us, making bread nests with eggs tucked inside is a perfect family activity for the long weekend. We like to use colourful shelled eggs from Vancouver Farmers’ Markets but any eggs will do. Did you know that the colour of the shell tells you the type of hen that laid the egg? Hen eggs with different coloured shells have the same nutrition inside. This recipe originally came from teacher Laura Clancy who made the nests with her kindergarten class. We have cooked up these nests with other classes and the precious results were taken home as gifts for family members.
Yield: 6 egg bread nests
Preparation Time: About 4 hours in total (25 minutes for dough preparation, 2 one hour periods for dough to rise, 30 minutes to shape dough)
Cooking Time: About 20 minutes

INGREDIENT LIST
- ¾ cup plus 3 Tbsp. milk, at room temperature
- 2 tsp. yeast
- 2 Tbsp. sugar
- 2 large eggs, at room temperature
- 2 large egg yolks, at room temperature (save egg whites to egg wash the bread)
- 2 Tbsp. vegetable oil
- 4 cups all purpose flour
- 1 ½ tsp. salt
- 6 eggs, for egg nests
EQUIPMENT LIST
- measuring cups and spoons
- large-sized bowl
- 3 small-sized bowls
- fork
- soup spoon
- liquid measuring cup
- spatula
- bench scraper
- cookie sheet with parchment
- sharp knife
- parchment paper
- pastry brush
METHOD
1. Measure the milk into a liquid measuring cup. Add the sugar and yeast and stir together with a spoon.
2. Crack 2 eggs into a small bowl. Crack 2 more eggs, adding the yolks into the egg bowl and the whites into another small bowl. (The egg whites will be used to paint the top of the egg nests before going into the oven.)
3. Add the vegetable oil to the eggs and whisk together with a fork.
4. Add the milk mixture to the egg bowl. Mix together.
5. Measure the flour and salt into a large bowl. Mix together with a fork or clean hand shaped like a claw. Make a well in the center of the flour with your fist.
6. Add the wet ingredients to the dry ingredients. Stir together with a spatula until all ingredients are moist.
7. Scrape the dough onto your work surface. Push all of the bits of dough together then knead for about 8 minutes, until the dough is soft and smooth. Shape into a ball.
8. Place a few drops of vegetable oil in a clean bowl. Add the dough to the bowl, smooth side down, swish it around then flip it over. Cover with plastic wrap or a clean tea towel and place in a warm (not hot) place for about an hour, until doubled in size.
9. Once doubled in size, remove the dough from bowl and place on a cutting board. Using a bench scraper (or knife), cut the dough into 6 equal sized pieces (a Y shape and then each piece in half).
10. Cut each of the 6 pieces of dough into half so that you have 12 equal sized pieces of dough.
11. Take each piece of dough and pinch it into logs then roll into logs about 1 foot (30 cm) long.
12. Pinch two logs together at the top. Pinch again.
13. Twist the logs together then pinch the other end together. Pinch again.
14. Loop the twisted dough and pinch the two ends together. Pinch again to ensure the dough will not come apart while baking. Tuck the pinched dough ends under the nests.
15. Place the dough nest on a parchment lined baking tray.
16. Repeat with the other dough logs to make 6 dough nests and place on baking tray.
17. Loosely cover with a clean tea towel. Let rise again in a warm place until doubled in size (about an hour).
18. Preheat oven to 350 F.
19. When the dough has doubled in size, brush the top of the dough nests with the egg white.
20. Place an uncooked egg in the center of the nest and give it a gentle push to nestle into the nest.
21. Bake in the oven for about 20 – 25 minutes or until the dough is golden on top.
22. Let cool on a cooling rack. Be careful moving the nests as the eggs may pop out.
23. Serve with butter, honey or jam. Keep the eggs in the fridge and enjoy as you would hard-boiled eggs.
SKILLS
STEP-BY-STEP – EGGY BREAD EGG NESTS!

STEP 1
Gather ingredients and kitchen equipment.

STEP 2
Measure all ingredients.

STEP 3
Add yeast and sugar to the milk. Mix. Measure then mix wet ingredients together.
 STEP 4
Measure and mix together dry ingredients. I used sifted Red Fife flour but all purpose flour will be fine. Notice how the flour feels on your hands. “Like a cloud”, we have been told by kids.
 STEP 5
Add wet ingredients to the dry ingredients. Mix together with one finger or a spatula until you have a “shaggy mass”. Scrape onto a floured surface.
 STEP 6
Knead the dough: push lump of dough away from you, fold the dough towards you, push the dough away from you then turn the dough. Repeat and get a workout until the dough is soft and smooth (about 8 minutes).
 STEP 7
Shape into a ball. Place in a lightly oiled bowl smooth side down, give it a swish and turn the dough over. Cover with plastic wrap or a clean tea towel. Put in a warm place and let yeast do it’s magic. Wait until the dough has doubled in size (about an hour).
 STEP 8
Once risen, place dough on cutting board and cut into 3 equal-sized pieces (a Y shape). Cut each piece in half again and you will have 6 pieces. Cut in half again and you will have 12 equal-sized pieces. Who knew math could be so much fun?
 STEP 9
Roll pieces of dough into logs about 30 cm in length (about the length of fingertips to elbow).
 STEP 10
Pinch two logs together at one end. Twist the dough then pinch the pieces together at the other end. Loop the dough to make a circle. Pinch ends together then tuck the two joined bits underneath.
 STEP 11
Place on parchment lined tray, or tray sprinkled with flour or cornmeal. Cover and let proof, or rise again, until doubled in sized (about an hour).
 STEP 12
Paint the tops of the nests with egg white left over from earlier in recipe.
 STEP 13
Tuck an uncooked egg in the centre of each nest.
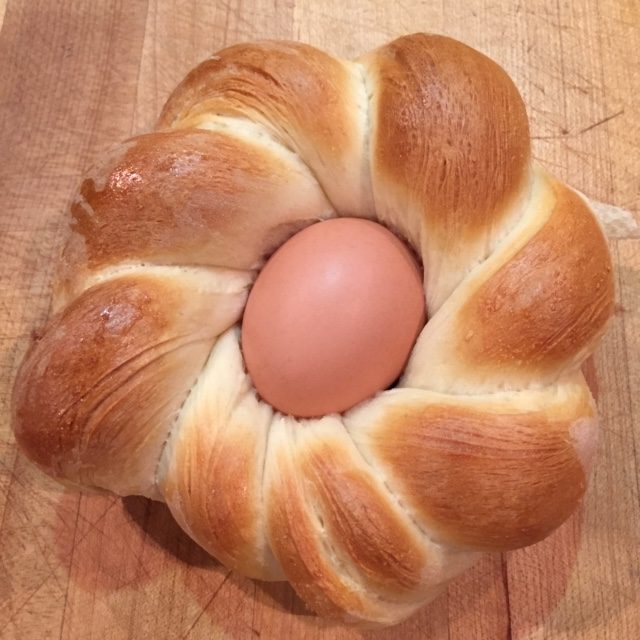 STEP 14
Bake in 350 F oven for about 20 – 25 minutes or until the nests are golden.
 ADDITIONAL ACTIVITY
Draw all the equipment you used to make this yummy meal.
©ProjectCHEF2020 All rights reserved
Not to be copied or reproduced without express permission from the author


